Ever wondered how to tap into real-time stock market data for your own projects? I’m here to walk you through it. This article is all about connecting you with the powerful world of stock market data APIs, especially AllTick’s real-time data API. Whether you’re interested in U.S. stocks, Hong Kong stocks, A-shares, forex, or even crypto, I’ll show you exactly how to get up and running with the kind of data that can make a serious difference.
Getting Started with AllTick API
Now I’ll guide you through the essential steps to effectively utilize the AllTick API. The process is straightforward, making it easy for anyone to engage with the platform efficiently.
Step 1: Registering for an Account
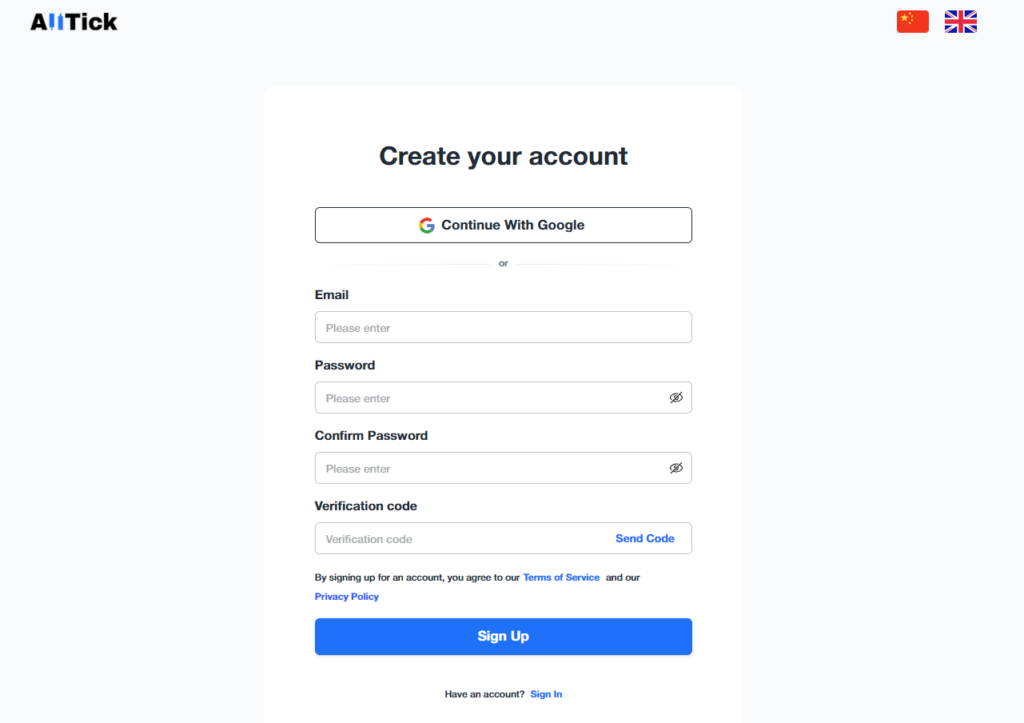
To begin, you will need to register for an account on AllTick’s website. The registration process is user-friendly, offering two primary options. You can either fill out the registration form with your details or choose the more convenient route of signing in with your Google account. One of the best parts is that registration is free, and there’s no requirement to provide any credit card information. This makes it easy to get started.

Step 2: Get Your API Key
Once you’ve successfully registered, you’ll gain access to the AllTick dashboard and you will find your own API Key here:

Step 3: Understanding Usage Quotas and Rate Limits
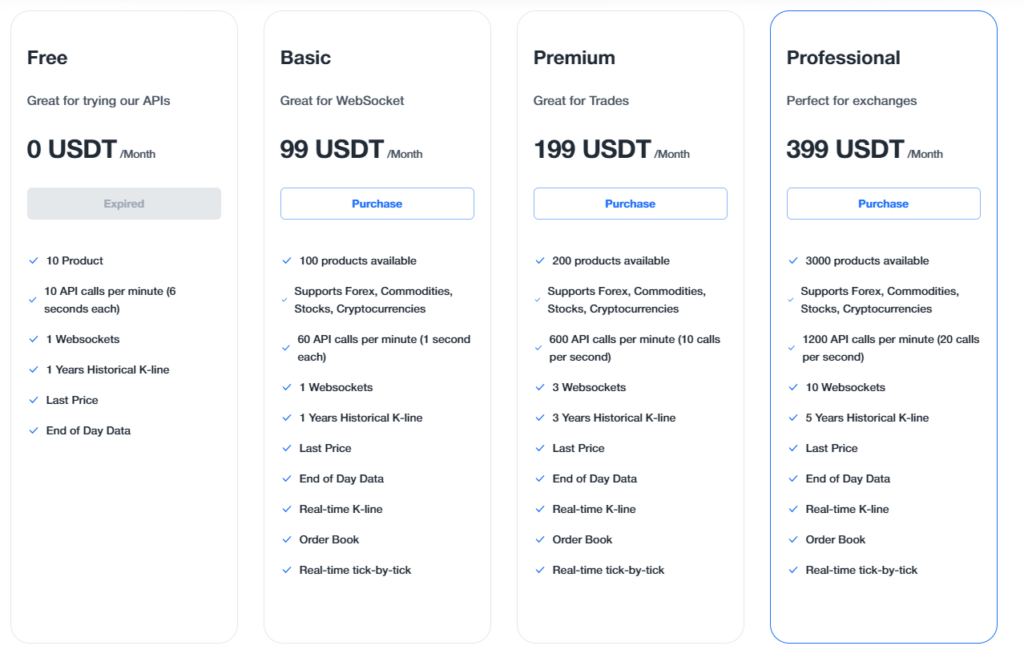
Before fully engaging with the AllTick API, take a moment to understand the usage quotas and rate limits associated with different account plans. Each plan has specific limitations on data retrieval and request frequency. Free accounts have defined constraints, but if you require greater access, you can consider upgrading to one of the paid tiers that offer enhanced capabilities.

Example Code to Send Requests Using AllTick API
To show you how to use the AllTick API to send requests, here’s a practical example using Python. This code demonstrates how to make API calls to retrieve real-time stock market data. Let’s break it down step-by-step.
import time
import requests
import json

# Extra headers for the API request
test_headers = {
    'Content-Type': 'application/json'
}

# Note: Replace "testtoken" in the URLs below with your actual API token.

# Define the API endpoints for different types of data
test_url1 = 'https://quote.tradeswitcher.com/quote-stock-b-api/kline?token=testtoken&query=%7B%22trace%22%20%3A%20%22python_http_test1%22%2C%22data%22%20%3A%20%7B%22code%22%20%3A%20%22700.HK%22%2C%22kline_type%22%20%3A%201%2C%22kline_timestamp_end%22%20%3A%200%2C%22query_kline_num%22%20%3A%202%2C%22adjust_type%3A%200%7D%7D'
test_url2 = 'https://quote.tradeswitcher.com/quote-stock-b-api/depth-tick?token=testtoken&query=%7B%22trace%22%20%3A%20%22python_http_test2%22%2C%22data%22%20%3A%20%7B%22symbol_list%22%3A%20%5B%7B%22code%22%3A%20%22700.HK%22%7D%2C%7B%22code%22%3A%20%22UNH.US%22%7D%5D%7D%7D'
test_url3 = 'https://quote.tradeswitcher.com/quote-stock-b-api/trade-tick?token=testtoken&query=%7B%22trace%22%20%3A%20%22python_http_test3%22%2C%22data%22%20%3A%20%7B%22symbol_list%22%3A%20%5B%7B%22code%22%3A%20%22700.HK%22%7D%2C%7B%22code%22%3A%20%22UNH.US%22%7D%5D%7D%7D'

# Send the first API request to retrieve kline data
resp1 = requests.get(url=test_url1, headers=test_headers)
time.sleep(1)  # Pause for a moment to avoid hitting the rate limit

# Send the second API request to get depth tick data
resp2 = requests.get(url=test_url2, headers=test_headers)
time.sleep(1)

# Send the third API request for trade tick data
resp3 = requests.get(url=test_url3, headers=test_headers)

# Print the decoded text returned by each request
text1 = resp1.text
print("Kline Data:", text1)

text2 = resp2.text
print("Depth Tick Data:", text2)

text3 = resp3.text
print("Trade Tick Data:", text3)
Explanation of the Code
- Import Libraries: We start by importing the necessary libraries:
time,requests, andjson. - Set Up Headers: We define the headers needed for the API request, specifying that we’ll be sending and receiving JSON.
- Define API Endpoints: We set up the URLs for different API endpoints. Each URL is tailored to fetch specific data types (like kline, depth tick, and trade tick) for the specified stock codes (e.g.,
700.HKfor Hong Kong stocks andUNH.USfor U.S. stocks). - Send API Requests: Using
requests.get(), we send a GET request to each API endpoint. To prevent hitting the API too quickly, we include a short pause between requests. - Handle Responses: Finally, we print out the responses received from the API for each request. This data can now be processed further based on your specific needs.
Get Real-Time Market Data Using AllTick WebSocket
To retrieve real-time market data using the AllTick WebSocket API, you can use the following Python example. This code outlines how to establish a WebSocket connection, subscribe to specific stock data, and handle incoming messages.
import json
import websocket    # Ensure you have the websocket-client library installed: pip install websocket-client

'''
# Special Note:
# GitHub: https://github.com/alltick/realtime-forex-crypto-stock-tick-finance-websocket-api
# Token Application: https://alltick.co
# Replace "testtoken" in the URL below with your actual token.
# Stock API address:
# wss://quote.tradeswitcher.com/quote-stock-b-ws-api
'''

class Feed(object):

    def __init__(self):
        self.url = 'wss://quote.tradeswitcher.com/quote-stock-b-ws-api?token=testtoken'  # Your WebSocket URL here
        self.ws = None

    def on_open(self, ws):
        """
        Callback executed when the WebSocket connection is opened.
        """
        print('A new WebSocketApp is opened!')

        # Example subscription parameters
        sub_param = {
            "cmd_id": 22002,
            "seq_id": 123,
            "trace": "3baaa938-f92c-4a74-a228-fd49d5e2f8bc-1678419657806",
            "data": {
                "symbol_list": [
                    {
                        "code": "700.HK",  # Hong Kong stock
                        "depth_level": 5,  # Depth level for market data
                    },
                    {
                        "code": "UNH.US",  # U.S. stock
                        "depth_level": 5,
                    }
                ]
            }
        }

        # Send the subscription request
        sub_str = json.dumps(sub_param)
        ws.send(sub_str)
        print("Depth quotes subscribed!")

    def on_message(self, ws, message):
        """
        Callback executed when a message is received.
        """
        # Parse the received message and print it
        result = json.loads(message)  # Using json.loads instead of eval for safety
        print(result)

    def on_error(self, ws, error):
        """
        Callback executed when an error occurs.
        """
        print(error)

    def on_close(self, ws, close_status_code, close_msg):
        """
        Callback executed when the WebSocket connection is closed.
        """
        print('The connection is closed!')

    def start(self):
        """
        Initiates the WebSocket connection and starts the listener.
        """
        self.ws = websocket.WebSocketApp(
            self.url,
            on_open=self.on_open,
            on_message=self.on_message,
            on_error=self.on_error,
            on_close=self.on_close,
        )
        self.ws.run_forever()  # Keep the connection alive

if __name__ == "__main__":
    feed = Feed()
    feed.start()  # Start the WebSocket feed
Import Libraries: We import the necessary libraries, including json for handling JSON data and websocket for WebSocket connections.
WebSocket Class Setup: The Feed class is defined to manage the WebSocket connection. In the __init__ method, the URL for the WebSocket connection is set up.
WebSocket Callbacks:
- on_open: This method is called when the connection opens. It sends a subscription request for specific stock data (in this case,
700.HKandUNH.USwith a depth level of 5). - on_message: This method handles incoming messages from the server, parsing and printing the JSON data received.
- on_error: This method is triggered in case of an error, printing the error message.
- on_close: This method is called when the connection closes, indicating that the connection has ended.
Start Method: The start method initializes the WebSocketApp with the defined URL and callbacks, then runs the connection indefinitely with run_forever().
Execution: In the if __name__ == "__main__": block, we create an instance of the Feed class and start the WebSocket connection.
Final Thoughts
Leveraging the AllTick API for real-time market data can significantly enhance your trading and financial applications. Whether you choose to utilize HTTP requests for straightforward data retrieval or the WebSocket connection for continuous, live updates, both methods offer unique advantages tailored to different use cases. By understanding the nuances of each approach, implementing robust error handling, and adhering to best practices, you can build effective solutions that respond dynamically to market conditions, ultimately providing users with timely insights and a competitive edge.
For a deeper dive into the capabilities of the AllTick API, we encourage you to explore our comprehensive API documentation. It’s packed with detailed information on endpoints, parameters, and best practices to help you get the most out of your integration. Additionally, don’t forget to check out our GitHub repository, where you’ll find code samples, updates, and a vibrant community ready to support you. Your journey to harnessing real-time market data starts here!


